5 min read
Die-line and Mockup in Packaging: How to Go from Plan to Product?
Complete guide on vector die-lines and 3D mockups in packaging design. Learn how to avoid print errors and deliver flawless product packaging.
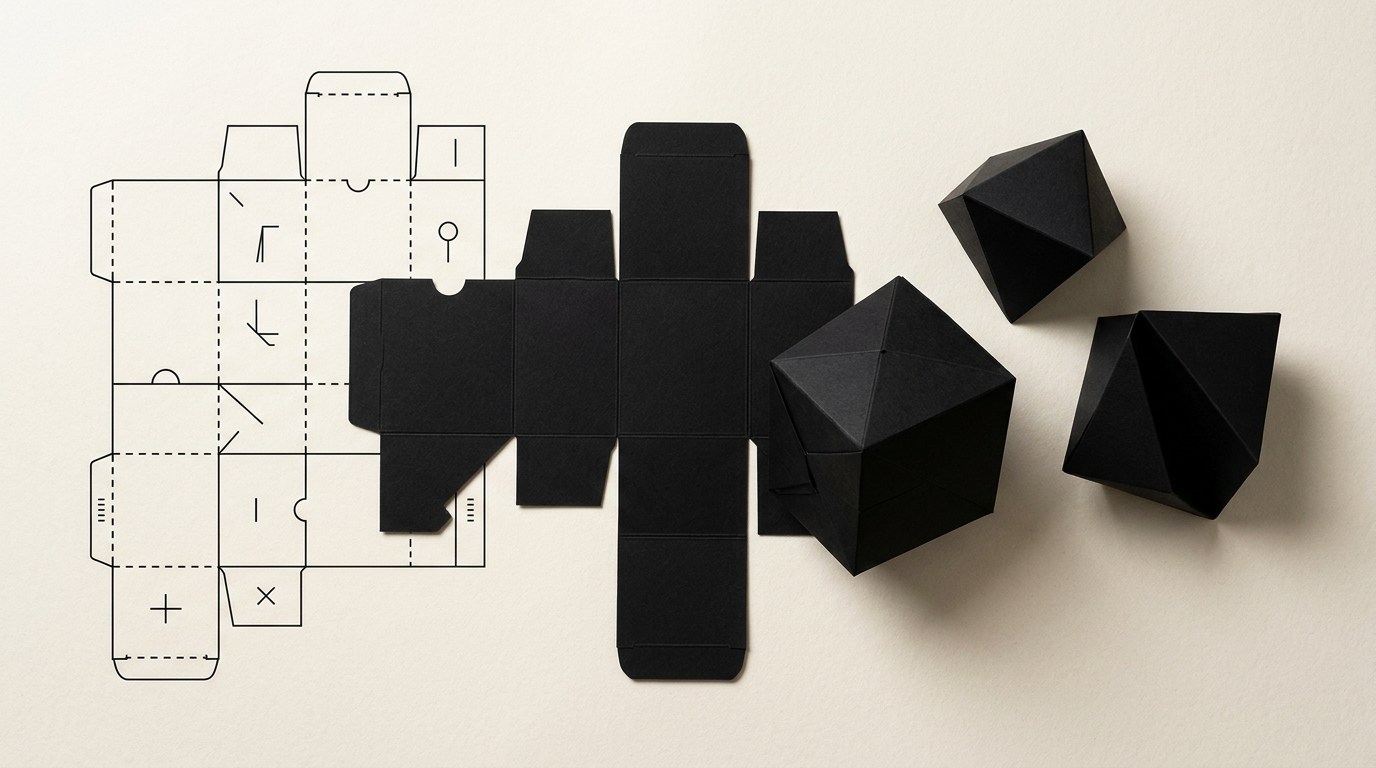
Moving from a visual concept to a shelf-ready physical package requires two essential technical pillars: the vector die-line and the three-dimensional (3D) mockup. Without these two elements, the risk of printing errors, misaligned folds, or unnecessary production costs increases dramatically. In this practical guide, I explain exactly how to transform a 2D layout into an impeccable finished product.
What exactly is a die-line and why is it critical in packaging?
A die-line is the 2D vector blueprint of a package, showing exact lines for cutting, creasing, folding, and gluing. A die-line is not just a simple graphic sketch, but the precise template used by printers to manufacture the cutting die. If folding lines are off by even 1 mm, the assembled box can warp, preventing the lid from closing properly. Additionally, a proper die-line marks 3–5 mm bleed areas, safe text zones, and unprinted glue tabs where ink or varnish must be avoided. Any serious design grafic project for packaging begins mandatory with this millimetric structure provided or validated by the print shop.
What is the difference between a 3D mockup and a physical prototype?
The main difference lies in the testing environment: a mockup is a 3D digital simulation, whereas a prototype is a physical sample produced on a cutting plotter. Both stages are vital before launching full-scale production.
- Digital 3D Mockup: Allows you to view graphics from any angle, ideal for validating aesthetics, marketing materials, and pitch decks.
- Physical Prototype (Dummy): An unprinted or digitally printed blank box, hand-assembled to test structural integrity, ergonomics, and internal fit.
Without an accurate 3D mockup, evaluating text legibility on side flaps or seamless brand pattern alignment is extremely difficult.
What mandatory technical specifications must a professional die-line contain?
A professional die-line file uses separate vector layers and dedicated spot colors set to Overprint so they don't accidentally print on the paperboard.
- Solid Cut Lines: Usually drawn in spot red (Cut Contour), marking the exact outer edge of the package.
- Dashed Fold Lines: Drawn in spot green or blue (Crease), showing where the cardboard will be scored and bent.
- Bleed and Safe Zones: A 3 mm bleed outside the cut line and an internal safe area free of critical artwork or copy.
- Glue Tabs and Perforations: Dedicated areas for industrial adhesive application or tear strips for easy opening.
Sending files to production without these clear technical layers leads to costly delays and remaking printing plates.
How do you avoid alignment errors when graphics cross multiple panels?
Alignment errors are avoided by accounting for paperboard thickness and testing artwork on 3D mockups prior to printing. When an illustration or background graphic spans from the front panel onto a side flap, you must calculate material loss at the fold (creasing allowance). E-flute corrugated cardboard (1.5 mm) or rigid board (2 mm) absorbs surface area during bending. When working on a complex project where packaging reflects a strong identitate vizuală, geometric elements must be calibrated in the source file. My recommendation is to print a 1:1 scale paper template, fold it manually, and double-check visual continuity.
Why do you need a complete visual identity before designing packaging?
Packaging does not exist in isolation on the shelf; it is the direct physical extension of your brand in front of consumers. Before drawing the first vector line, you need clear rules for color palettes (Pantone, CMYK codes), typography hierarchy, and asset usage. A proper creare logo process establishes brand versatility across dark or light backgrounds as well as clear space rules on physical containers. If you attempt packaging design without a structured brand guide, you risk color inconsistencies across print runs or illegible typography. A mature brand identity ensures all product variants maintain a unified, premium look.
How long does it take and how much does a custom die-line and mockup cost?
Timeframe and costs depend heavily on structural complexity and whether you use a standard FEFCO/ECMA template or a custom shape. For a classic folding carton (like a tuck-end box), adjusting an existing die-line and creating 3D mockups takes 2 to 4 business days. If the project requires engineering a custom structure from scratch with internal cardboard inserts, it can take 7 to 10 days. Packaging design fees typically start around 300–500 EUR for a single product SKU and scale up for multi-flavor ranges. This initial investment prevents thousands of Euros in losses caused by faulty cutting dies at the printer.
How do 3D mockups boost marketing and online sales?
High-resolution 3D mockups effectively replace expensive product photoshoots, especially before the first physical batch leaves the factory floor. You can use photorealistic renders for crowdfunding campaigns, digital catalogs, or product listings on a modern site de prezentare. Furthermore, when applying optimizare GEO / AEO / AIO strategies to your product pages, clean technical descriptions and optimized renders are easily parsed by AI search engines. Crisp product imagery on clean background or in lifestyle scenes increases conversion rates and gives your store a professional look from launch day.
What final preflight checklist should be completed before press approval?
A final preflight check requires going through a strict technical checklist to eliminate any printing or layout errors before approving the press proof.
- Outline All Fonts: Prevents font substitution issues when files are opened by the pre-press operator.
- Color Mode Verification: Ensure all elements are set to CMYK or designated Pantone spot colors with no RGB profiles.
- Image Resolution: Maintain at least 300 DPI at 1:1 scale for all embedded raster assets.
- Foil Stamping and Spot UV Layers: Files for special finishes must be delivered on separate layers as 100% K vector artwork.
Final sign-off on the printer's soft proof is the mandatory last step before initiating mass production.
Ce urmează?
Need packaging that captures attention on store shelves and fits technical requirements perfectly? Explore my recent work in the portofoliu to see how I transform ideas into market-ready physical products. If you already have product specifications or need expert guidance, head over to the contact page and let's discuss your brand's next packaging project.